How to Manually Root Your Android Phone with Magisk
Rooting your Android phone gives you full control over the operating system, allowing you to customize it to your liking and remove bloatware. However, it's important to note that rooting your phone can also void its warranty and make it more vulnerable to security risks.
If you're still interested in rooting your phone, here are the steps to do so manually using Magisk:
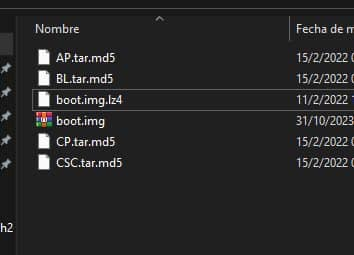
- Open the AP File with 7zip.
- Extract the boot.img file.
- Right-click on the extracted boot file and select 7zip > Add to archive.
- Select Compress on. > tar.
- Download Magisk in the version you want to use and copy the Magisk.apk and boot.img.tar files to your phone's internal storage.
- Install Magisk on your phone.
- Select Install > Next.
- Under Method, select Select and Patch File.
- Navigate to the boot.img.tar file and select it.
- Once the patching process is complete, the MAGISK_PATCHED file will be created in your phone's download folder.
- Copy the MAGISK_PATCHED file to your computer.
- Boot your phone into download mode.
- Flash the MAGISK_PATCHED file to the AP slot.
- Reboot your phone.
Your phone should now be rooted! You can verify this by installing a root checker app from the Google Play Store.
source https://www.softwarecrackguru.com/2023/11/how-to-manually-root-your-android-phone.html


Post a Comment for "How to Manually Root Your Android Phone with Magisk 2023"